
Acadia Winter Hiking Gear Guide
This post contains Amazon Affiliate links, which means we receive a small commission if you make a purchase using these links. This is what funds our website, and we only recommend products that we believe in.
I often spend more time hiking in Acadia in the winter than I do the summer because there aren’t any crowds, and I personally love being alone with nature (particularly snowy owls). I recently went to Acadia to visit these magical snowy owls, and this article talks in more detail about the gear I used on that hike, including photography gear.

Acadia National Park is on the coast of Maine, which means it gets different weather than further inland. Water (the ocean in this case) is resistant to sudden temperature changes, and this is the reason the coast is cooler in the summer and warmer in the winter. Although I only live an hour away in Bangor, I never know what to expect in terms of trail conditions when I get to the coast. Therefore, I bring everything with me in my car and choose what to use when I get there.
The first half of the hike is on the carriage roads. This section of trail is wide and has a gentle incline which makes it great for cross-country skiing. However, it is often icy or lacks good snow, so skiing isn’t always the best option. If the snow is really deep (ex - after a big storm, before other hikers pack it down), I would recommend snowshoes. Below is a more detailed list of the gear I usually end up using on the hike.
My layering system:
I use the same layering system on all of my winter hikes. My base layer is always a tight synthetic layer like the Under Armour Cold Gear long sleeve shirt. Next up I wear a quarter-zip fleece because it is lightweight, warm, and never seems to take on much water or sweat. Even when I take my fleece out of the wash it feels dry, and that's an important quality to have in winter apparel. Outside of my base layer and fleece will be an insulated vest (only if it's REALLY cold), then an insulated jacket, and then a Gore Tex hard shell (I prefer hard shells with pit zips in case you need more ventilation). I also keep my “Everest Jacket” (the Mountain Hardwear Nilas) stowed away in my bag just in case there is an emergency or if I know I will be exposed to the elements while stopped (ex - while taking photos of the owls). Dale prefers using wool as his base layers. If you use wool, I would highly recommend using SmartWool products for both your top and bottom. Wool can get itchy depending on the brand, so don’t go too cheap!

The above photo was taken on the summit of Mount Katahdin. I am wearing my Marmot Minimalist jacket (outer hard shell). Underneath that is my puffy insulated Marmot Dena jacket. I have my polar buff keeping my face/neck warm, my Mountain Hardwear Onza mittens, Eddie Bauer Igniter Pants, Outdoor Research Crocodile Gators, Salomon Snowtrip winter boots, and Kahtoola nano spikes. Dale is wearing the same nano spikes and gators. He is also wearing the Outdoor Research Furio pants and a North Face 3-in-1 jacket. He is using the Osprey Stratos 36 backpack, and I’m using the Osprey Tempest 30.
Jacket: Marmot Dena and Mountain Hardwear Nilas

My Mountain Hardwear Nilas jacket kept me toasty warm in a snowstorm on Mount Elbrus (Russia), so I always keep in in my backpack on any winter hike!
I brought the Marmot Dena as my main jacket to wear up until we got above treeline. My favorite part about this jacket is that it’s insulated with recycled materials. It also has an interior chest pocket for me to keep my camera batteries warm. I carried my Mountain Hardwear Nilas jacket with me in my backpack which is a super warm 800-fill down jacket. The down is water-repellent, so it retains its loft even when wet. It packs down to be just a little bigger than a Nalgene bottle, so it didn’t take up too much space (or weight) in my backpack. I wore this jacket on my climb up Mount Elbrus, the highest mountain in Europe (18,510 feet), and I was warm even in a snowstorm. When I got above treeline on Sargent Mountain, I took off my Marmot Dena jacket (which was a little sweaty) and replaced it with the Mountain Hardwear Nilas. I was warm the entire time, even though I spend 45 minutes stopped and taking photos of the owls. The men’s versions of the above jackets are the Marmot Baffin and Mountain Hardwear Nilas.
Snow Pants: Eddie Bauer Igniter Pants and Outdoor Research Furio Pant

I originally got these insulated snow pants for my Mount Elbrus trip, and they did a great job at keeping me super warm in frigid conditions. I was nervous they’d keep me TOO warm on this hike, but they ended up being perfect! The great thing about these pants is that they have side zippers that run all the way up the length of the pant. This not only allows you to take your pants off while keeping your boots on, but it also allows you to vent your legs if they are overheating. Unfortunately, Eddie Bauer doesn’t make this snow pant any more, but their First Ascent line of gear has always impressed me, so I would encourage trying other styles. I combined my snow pants with Outdoor Research Expedition Crocodile Gaiters to prevent my crampons from catching onto and ripping my pants. I’ve only needed crampons once on this hike, but gaiters also have the benefit of keeping you from getting snow down your boots. I wore a pair of Eddie Bauer fleece leggings under the snow pants which were warm, soft, and stretchy! Dale prefers a different style of pant. Instead of an insulated snow pant, he LOVES his Outdoor Research Furio Pants which are a durable waterproof / windproof hard shell pant that pairs well with a wool baselayer.
Hat: C.C. BeanieTail Hat

I have a confession to make: I am obsessed with a hat with a hole in it! The C.C. BeanieTail Hat is a comfy cable knit hat that is designed to let you stick your pony tail through the top so you can keep your hair up and out of your face. It comes in a ridiculous number of color options (mine is the Purple Tribal Blend), and it is my go-to hat in all aspects of my life (except maybe a winter climb up Mount Katahdin, Washington, or other intense winter hike). The only complaint I have with this hat is that it doesn’t have a fleece lining, so the wind goes through it at the summit, and I needed to put my hood over my head to keep my head warm. I would recommend the Dakine Women’s Vine Beanie if you’re looking for something warmer. This is also a very cute hat that is fleece-lined and very warm!
Gloves: Mountain Hardwear Onza Mittens and Outdoor Research Alti Mitts
From what I’ve gathered, the Mountain Hardwear Onza Mittens are no longer in production, so I’ll be brief in my review of these. I brought these mittens for the lower part of the climb, and when I got to the summit, I added my glove liners because I knew I’d have to take my mittens off to work with the camera. The nice thing about the Onza mitten is that there is no insulation in the palm. Instead it is a layer of leather with a fleece lining, and this makes it very easy to hold onto hiking poles, ice axes, branches, etc. Although I have never used them, I did try on a pair of Outdoor Research Adrenaline Mitts which had a very similar feel to the Onza Mitts and would likely be my next purchase when mine fall apart.
I kept my Outdoor Research Alti Mitts in my bag in case of an emergency. I call these my “Everest Mittens” because they are actually used by climbers on Mount Everest. They are the warmest mittens I’ve ever owned, and I’ve never gotten cold in them, not even when climbing Mount Elbrus. The mitten has a PrimaLoft insulated liner which is warm on its own, and there is a pocket for hand warmers which I never needed to use. The outer glove is also insulated with PrimaLoft and has a Gore-Tex shell to keep it waterproof and breathable. I’ve had good luck with Outdoor Research products. They tend to be more reasonably priced, and they have a lifetime guarantee on all of their products. The only annoyance I noticed with these mittens was that it was a little harder to hold onto things while wearing these gloves because of all the insulation. This is not a product issue, but instead an issue with me not being used to wearing really warm gloves! These gloves come in men’s and women’s styles. They have won several awards, including Backpacker Magazine’s “Best for Extreme Cold,” and Outside Magazine’s “Best Winter Survival Winter 2014”.

Putting on my Mountain Hardwear Onza mittens while climbing Mount Washington. I had my Outdoor Research Alti Mitts in my bag for the summit. Also pictured is the Marmot Dena jacket, Osprey Stratos 36 backpack, and polar buff.
Balaclava: Polar Buff and Outdoor Research Windstopper Gorilla Balaclava

I love my buff! Dale and I wear them all year long, and the polar buff is great for winter activities. The buff is a tube of fabric, part fleece and part thin fabric, and it can be made into all sorts of protective gear (hat, balaclava, neck warmer, etc). Its versatility is what makes it so great for me. I wore my polar buff as a neck warmer on the bottom part of the climb, and I expected to transition to my heavier-duty balaclava as we got above treeline (which I didn’t need to do). During some windy spells, I did pull my polar buff up over my face a little, but that was all I needed.
The Outdoor Reserarch Windstopper Gorilla Balaclava is a serious balaclava designed for alpine environments. I wore this on Mount Elbrus, and the Gore Windstopper fabric is a true barrier against the wind. I didn’t need it this time, but it was worth having this in my bag in case the weather made a turn for the worse.
Crampons: Kahtoola NANOspikes and Black Diamond Contact Crampons
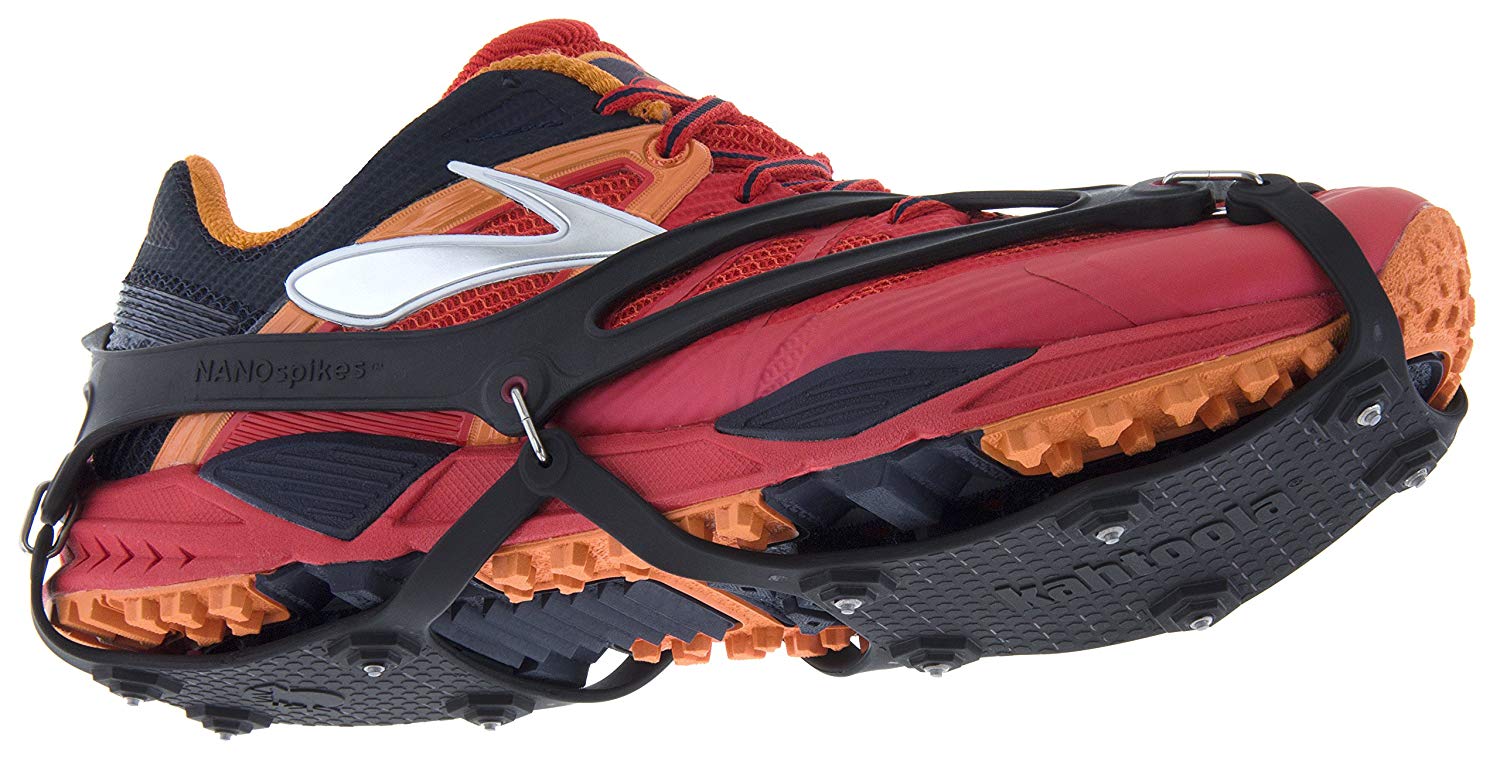

If I could recommend one winter item to get for this hike, it would be a pair of nano spikes! I originally got these for a winter adventure race, and ever since then I have been in love with them! Nano spikes have small metal “nubs” on the bottom of them, and they slip on easily over your winter boots. They are lightweight and low profile, and they do a great job giving you traction on ice as well as snowy trails. They can also be used off the mountain, for example when walking your dog on the icy roads. Nano spikes are usually sufficient enough to get you up Sargent Mountain, but if it is more icy than usual, you may need crampons (see below).
I always carry my crampons in my bag just in case it is too icy to make it up the slick icy rocks on the summits of Acadia’s mountains. Black Diamond’s Contact Crampon is a great option from a reputable brand that is also reasonably priced. These crampons have treated me well so far, and the fact that they are strap on allows you to use it with multiple types of boots. I have used these crampons with mountaineering boots and smaller snow boots, and they worked great in both situations. I was able to fit both our crampons in my Black Diamond crampon bag to prevent the spikes from ripping our backpacks when they were stowed away
Backpacks: Osprey Stratos 36 and Mountainsmith Borealis

Mountainsmith Borealis camera backpack
There are many good backpacks out there, and I recommend getting one that fits your needs. One thing I like about my Osprey pack is the “Stow-On-The-Go” trekking pole attachment, which allows you to stow away your trekking poles without having to take off your pack. It also had just the right size and number of compartments to fit my needs. Dale carried the Osprey Stratos 36 backpack, and I used the Mountainsmith Borealis to carry my camera gear. The great thing about the Borealis is that there is a separate bottom panel that allows you to stow your camera and lenses. It also gives you a spot on the side to put your tripod. I own a previous model, and the tripod holder is in the front of the pack which makes it impossible to open the camera compartment without unhooking the tripod. It looks like they fixed this problem by moving it to the side of the backpack. The top compartment is where you can store extra layers, food, etc. There is also a separate laptop compartment and waterproof rain cover. My favorite thing about this backpack is that it also contains all the technical components seen in other hiking backpacks. The Borealis is noticeably heavier than other day packs, but for the purpose of protecting my camera equipment on a hike that is not intended to be done ultralight or fast, it does the trick for me.
Water system: Camelbak Classic Hydration Pack
I’ve always had difficulty trying to find a water system that works for me in the winter. Camelbak hoses freeze almost instantly in cold weather, even when using an insulated hose. I’ve even tried blowing the water back into the reservoir so that it is just air in the tube, and that doesn’t work either. I can’t drink out of wide-mouthed bottles without spilling water all over myself, and narrow-mouthed bottles freeze up quick.

Dale and I came up with a great solution to this problem, and we tested it in the Bangor Forest on our weekly adventures before using it on bigger hikes. What we did was wear a small Camelbak that was just big enough to hold a 2 liter reservoir and then wear that backpack underneath our jacket so that our body heat kept it warm. You keep the hose inside your jacket as well, except when you take it out to have a drink. Every once in a while the hose will freeze in really cold temperatures if it’s near my zipper, but I’m generally okay, especially when I blow the water out of the tube. We use the Camelbak Classic Hydration Pack. When using this during our extra-frigid Frigid Infliction adventure race, many people’s water bottles froze, but not ours.
A few notes: Wearing a backpack underneath a backpack is not a nuisance at all once you get used to it. Also, I have NOT had luck with knock-off brands of CamelBak. Going cheap might result in a leaky reservoir, and that is no fun.
An alternative system is to use a thermos. This thermos has kept my water HOT in extremely cold conditions for hours, and there’s nothing better than having a nice hot sip of water on a cold mountain top. I usually steep some tea in the thermos before we leave because I find that goes down easier. The one thing I don’t like about a thermos is that there always seems to be a little bit of water spillage when you open and close the components.
Boots: Salomon Snowtrip TS WP Winter Boot

I love these Salomon boots! This is my FIFTH year using them as a winter boot, and they are so comfortable and easy to walk in. They’re also super warm, yet I never seem to overheat in them. I’ve had good luck with Salomon footwear in general (Men’s version here). Some features I like about this boot are:
It has a wide toe box. One thing I can’t stand is when shoes are compressing my toes too much.
My foot doesn’t move in them. My boots are snug, but not overly tight, and my feet don’t slide and jam into the front of the boot when I’m going downhill.
They’re waterproof.
They “roll” when you run. I find it hard to run in a lot of snow boots because they’re so clunky, but the sole of these boots are rounded in the front and back, allowing you to have a more natural running gait. I’ve never been comfortable running in snow boots until I got these.
They’re lightweight. Yay!
Salomon doesn’t make the Snowtrip boot anymore, but I imagine their other winter boots are comparable.
GPS: Garmin Fenix

I like wearing a GPS watch to track my mileage, speed, and altitude. The Garmin Fenix won me over for two reasons: 1) It measures altitude, which most GPS watches don’t, and 2) The battery life is up to 50 hours, which is ridiculously long for a GPS watch. The watch is waterproof up to 50 meters and has more features than I know what to do with. The only downside is that it is a bit bulky, but that has never bothered me. I use this watch every time I hike, paddle, run, bike, and climb, and it does an excellent job on the trail and later on the computer as it plots your trail on a map. Garmin has come out with newer versions of the Fenix, but I can’t speak on those since I have not used them. I would recommend wearing this on your wrist or putting it in an inner pocket to keep it warm and preserve the battery life.
Poles: Black Diamond Distance Carbon FLZ Trekking Poles

When picking out a trekking pole, I would recommend going as light as possible. Just a few ounces can make a huge difference in arm fatigue, and these poles are about as light as you can get. There’s a few things I like about the Black Diamond Distance Carbon FLZ Trekking Poles, and if you decide to buy them, make sure they have all these specs since there’s different types of poles made by Black Diamond that look very similar.
Carbon - This is what makes them so light. Each pole weighs a little over 6 ounces.
Packs up small - These poles have two joints that allow you to collapse your poles to fit in nearly any backpack (or suitcase if you are traveling).
Adjustable - The “FLZ” part of this pole refers to an adjustable segment at the top of the pole that allows you to fine-tune your pole’s length to your size. Ideally, you want your poles to be shorter going uphill and longer going downhill, and this pole allows you to do that.
For winter hiking, I would recommend buying snow baskets so your poles don’t sink in the snow with every step!
Camera and Lenses
The purpose of our hike up Sargent Mountain was to photograph the snowy owls. Therefore I opted to bring my nicest camera, the Canon EOS 5D Mark IV. This is a great camera that takes amazing photos, but if you’re not ready to dish out the money for a top-line DLSR, another option is the Canon Rebel T7. On the scale of cameras, this one is the cheapest camera in Canon’s DSLR line. It takes amazing photos, and I have captured some beautiful shots with it, from the Northern Lights to bald eagles to canoe-racing wipeouts. In regards to lenses, I would recommend this 75-300mm telephoto lens for a more affordable lens, and the Sigma 150-600mm 5-6.3 Contemporary DG OS HSM Lens if you’re looking to upgrade from there. There are much more expensive telephoto lenses, but I don’t have the money (nor experience) to comment on them. I would recommend bringing extra batteries and keeping them in an inner pocket of your jacket to keep them warmer and preserve the life of the battery. I only needed one battery for the snowy owl photo session, but the last thing you want is to have your battery die on you after lugging all your gear up the mountain! I used the MeFOTO Classic Carbon Fiber Globetrotter Tripod. This is very stable and helped get a clear shot despite the wind blowing hard on the mountain.
Another option for a camera, if you’re not ready to invest in a DSLR and lenses, is to get the Nikon COOLPIX P900 Digital Camera. I have never used this camera, but I have a friend who takes AMAZING photos which he attributes to the 83x optical zoom that he has used to photograph a solar eclipse, close-up of birds, etc.


Food
Winter hiking makes it difficult to pack food because you need items that won’t freeze. We didn’t bring any food with us on this hike because we knew it wouldn’t take us long, but these are some ideas that I use on other winter hikes that work well:
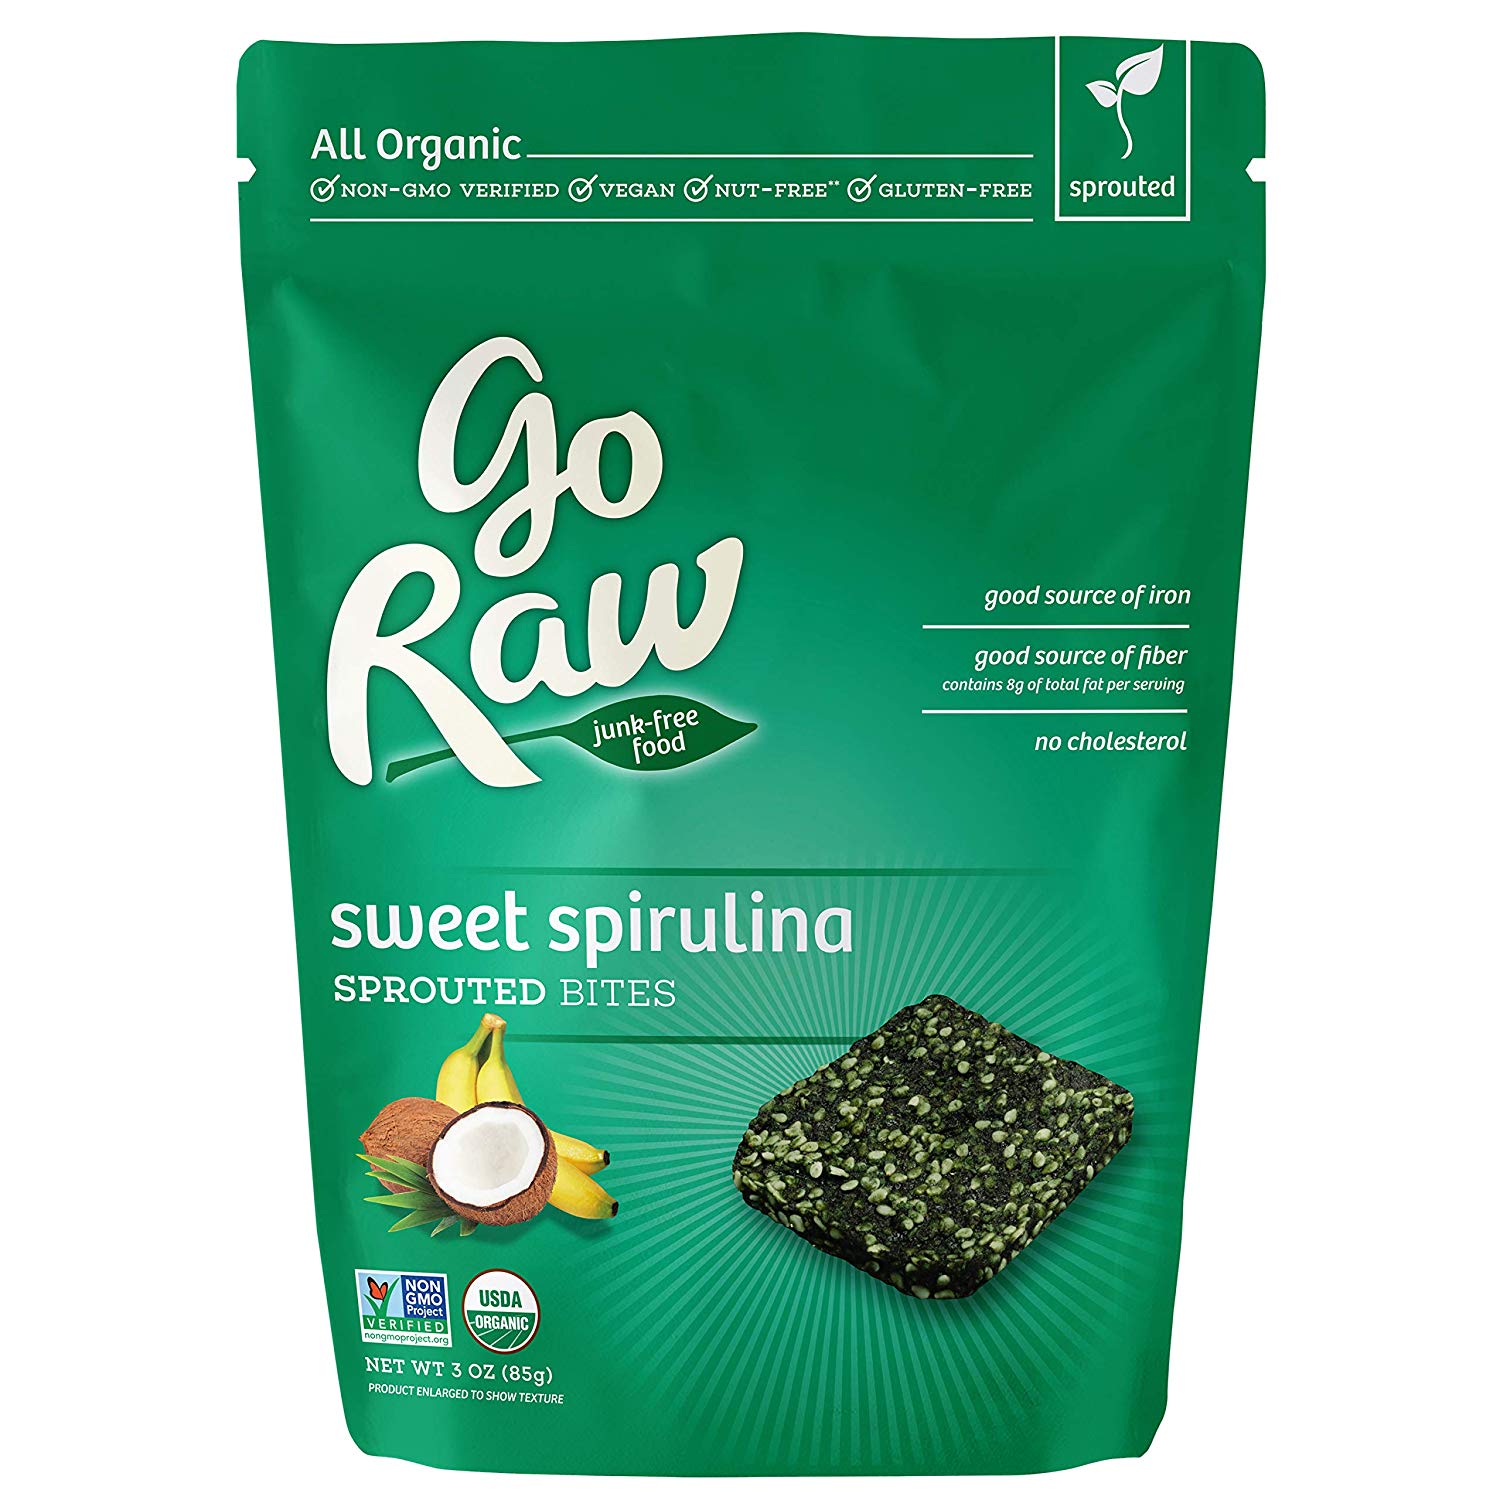
Go Raw Spirulina Sprouted Bites – These might look and sound like some weirdo hippie food (and maybe they are), but these things are DELICIOUS! They are dehydrated crackers made from bananas, sesame seeds, coconut, dates, and spirulina. They have a nice rich taste to them and just taste heavenly (like a banana coconut smoothie). When I bought them at our natural living store the cashier said, “These are my favorite!” Since they’re dehydrated, they won’t freeze in the cold weather and you won’t break your teeth trying to eat them. The only downside: they’re expensive! If you have a dehydrator, try out this recipe to make them at home! Another flavor that is delicious is their lemon pie cookie.
Wella bars – These are peanut butter and almond butter bars, and were pretty much the only bars I had that didn’t freeze up on me.
Homemade chocolates – I prefer homemade chocolates because you have control of the sweetener you use. I prefer honey. The chocolates sweetened with honey tend to melt easier, which also means they are easier to bite into when frozen.
Trail mix – I usually get my trail mix in bulk at our Natural Living Center, as long as it doesn't have artificial sugar in it.
Dehydrated fruit – fruit leathers, dried apricots, raisins, etc.
Homemade dehydrated snacks – It’s cheaper, you choose the ingredients, and you waste less plastic!
These are foods I love as trail snacks but aren’t the best in the cold because they freeze and are impossible to bite into. A way to get around this is to store them in an inside pocket so your body heat keeps it warm:
“Just in case” items
Dale and I like to pack light, but in the winter I prefer to carry more than usual just in case something happens. Even though the hiking in Acadia isn’t as intense as other bigger mountains, it can still be dangerous. In fact, “easier” winter hikes end up being the more dangerous ones because you’re less likely to be prepared if something bad happens. I recently spoke with a friend of mine who is an experienced mountaineer, and one of his scariest moments happened when he got caught in the fog on top of a mountain in Acadia, got lost, and didn’t have a headlamp with him when it got dark. So with that being said, here are some of our “just in case items”:
Extra everything – As you may have noticed above, I brought an extra (and warmer) pair of nearly every clothing item. Reason #1 was so I had the warmest possible clothing options available. Reason #2 was so I had a DRY option to change into if needed. If one of us got injured and we had to slow down, we would get cold very quickly if we didn’t have extra dry clothing.
Black Diamond ReVolt Headlamp – Sargent Mountain is a day hike, so we had no intentions of being out in the dark. Of course anything can happen to slow you down, whether it be an injury, poor visibility, deep snow, trouble getting down steep sections, etc. Both of us had our headlamps just in case. The ReVolt is a cool headlamp because you can charge it with a USB cable (see my charger recommendation below). The only downside with this headlamp is that the batteries may die when exposed to cold temperatures. A better choice may be the Black Diamond Icon Polar headlamp because it has an external battery pack that you can stick somewhere warm like a jacket pocket. However, this one cannot be charged on the the trail like the ReVolt can.
Solar Charger – I carried the Bushnell Bear Grylls SolarWrap Mini USB Charger in my bag in the event I needed to charge my ReVolt headlamp or phone in an emergency (the headlamp and phone use the same micro-USB charger cable). It is very tiny and doesn’t take up a lot of space. You can pre-charge the lithium ion battery pack in 4 hours using an outlet at home, but when you are out on the mountain it unrolls into a solar panel that can recharge it as well. There are way bigger and more powerful solar panels out there, but this little guy is enough to keep the basics going when you’re away from civilization.
First aid kit and compass – A compass and map is a must-have for any hike, in my opinion. Even if you’re not an experienced compass-reader, you can at least get a general idea of where you need to go in case you experience poor visibility or get lost. Of course you should have a map with you as well, which makes the compass a bit more useful (and vice versa). Don’t rely on a GPS to get you home since the batteries may die in the cold weather. Our first aid kit was simple. We had a little bit of duct tape, an ACE bandage, waterproof matches, fire starter “cubes”, and some toe warmers. We usually carry little whistles as well, but each of our backpacks had a whistle designed into the chest strap.